Tools & Connectors
Tools extend your agent beyond conversation by letting it perform actions, browse content, and interact with external systems.
At a glance: Tools and connectors give agents action capabilities and controlled integrations with external systems. For the complete tool management guide, see Tool Hub.
This guide shows how to add tools to an agent and configure access safely.
Prerequisite: Enable Tools in Tool Hub
Before an agent can use tools, your enterprise must have tools enabled and configured with a valid authentication scope.
- Enterprise scope: One shared enterprise account is connected once and used by all users.
- User scope: Each user connects their own account and uses personal credentials.
If tools are not enabled with the required scope, they may not appear in the agent tool picker or may fail at runtime.
To create and manage tools, see Tool Hub.
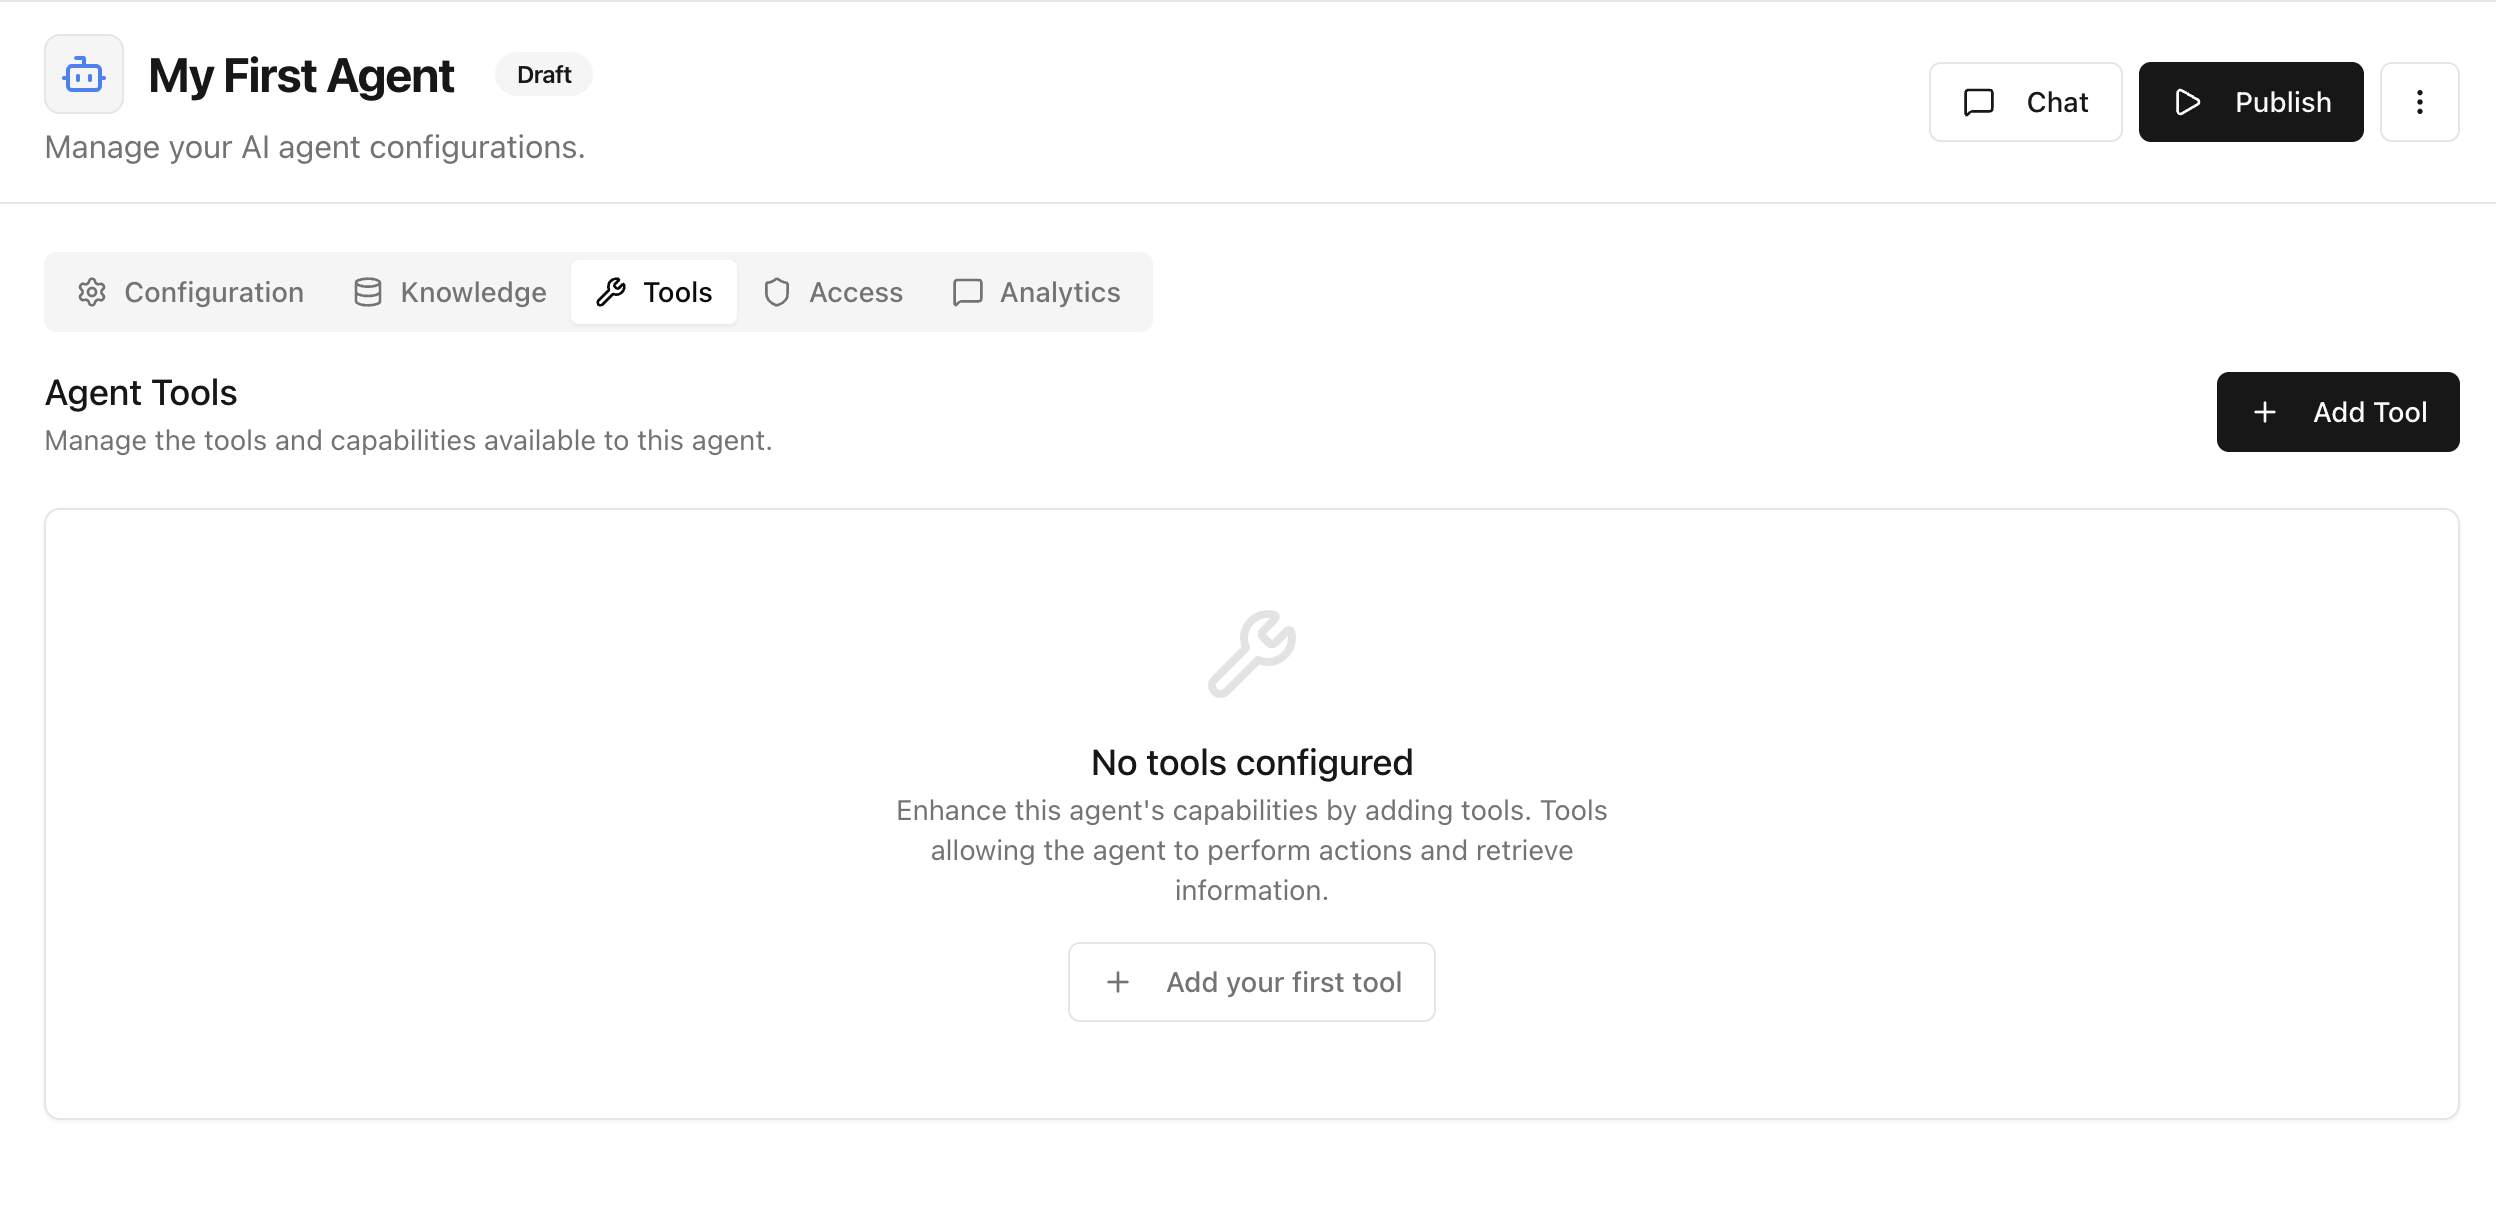
Step 1: Open the Tools Tab
From your agent page, open Tools and click Add Tool.
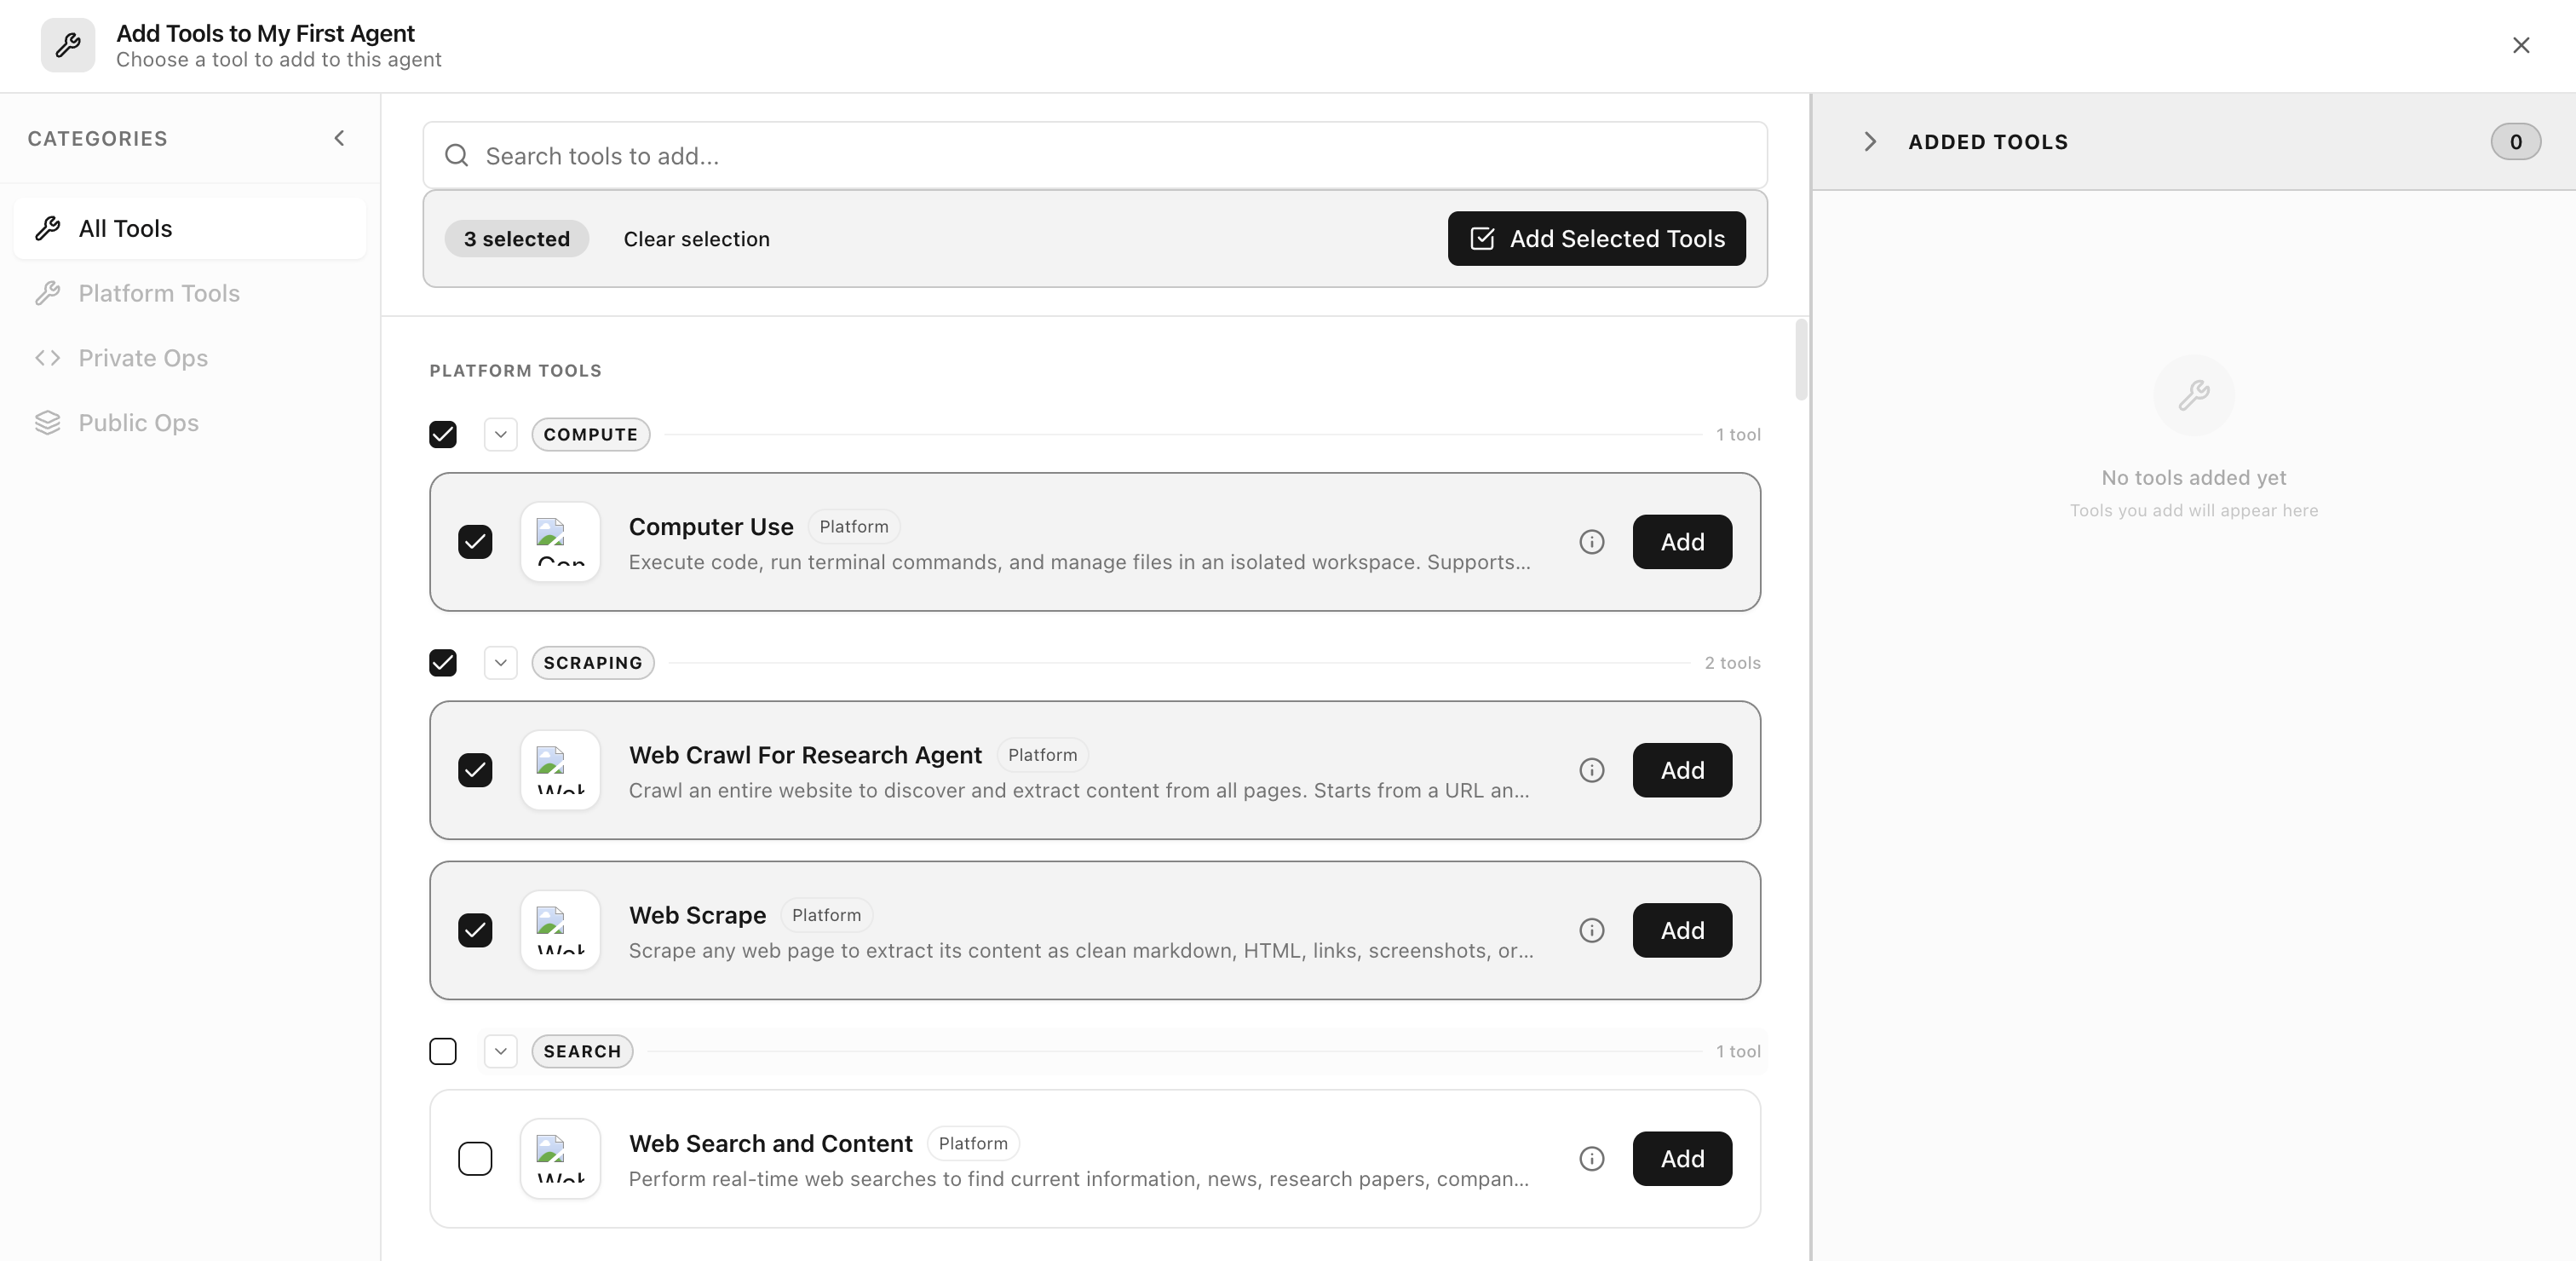
Step 2: Select the Tools to Add
In the picker modal:
- Browse by category or search by name
- Select one or more tools
- Click Add Selected Tools
Example tools shown below include Computer Use, Web Crawl For Research Agent, and Web Scrape.
Step 3: Configure Tool Access
After selecting tools, set who can use each one.
- Use Apply to all tools to set a default quickly
- Override individual tools when needed
- Choose the right access mode (for example:
Privatefor internal-only operations)
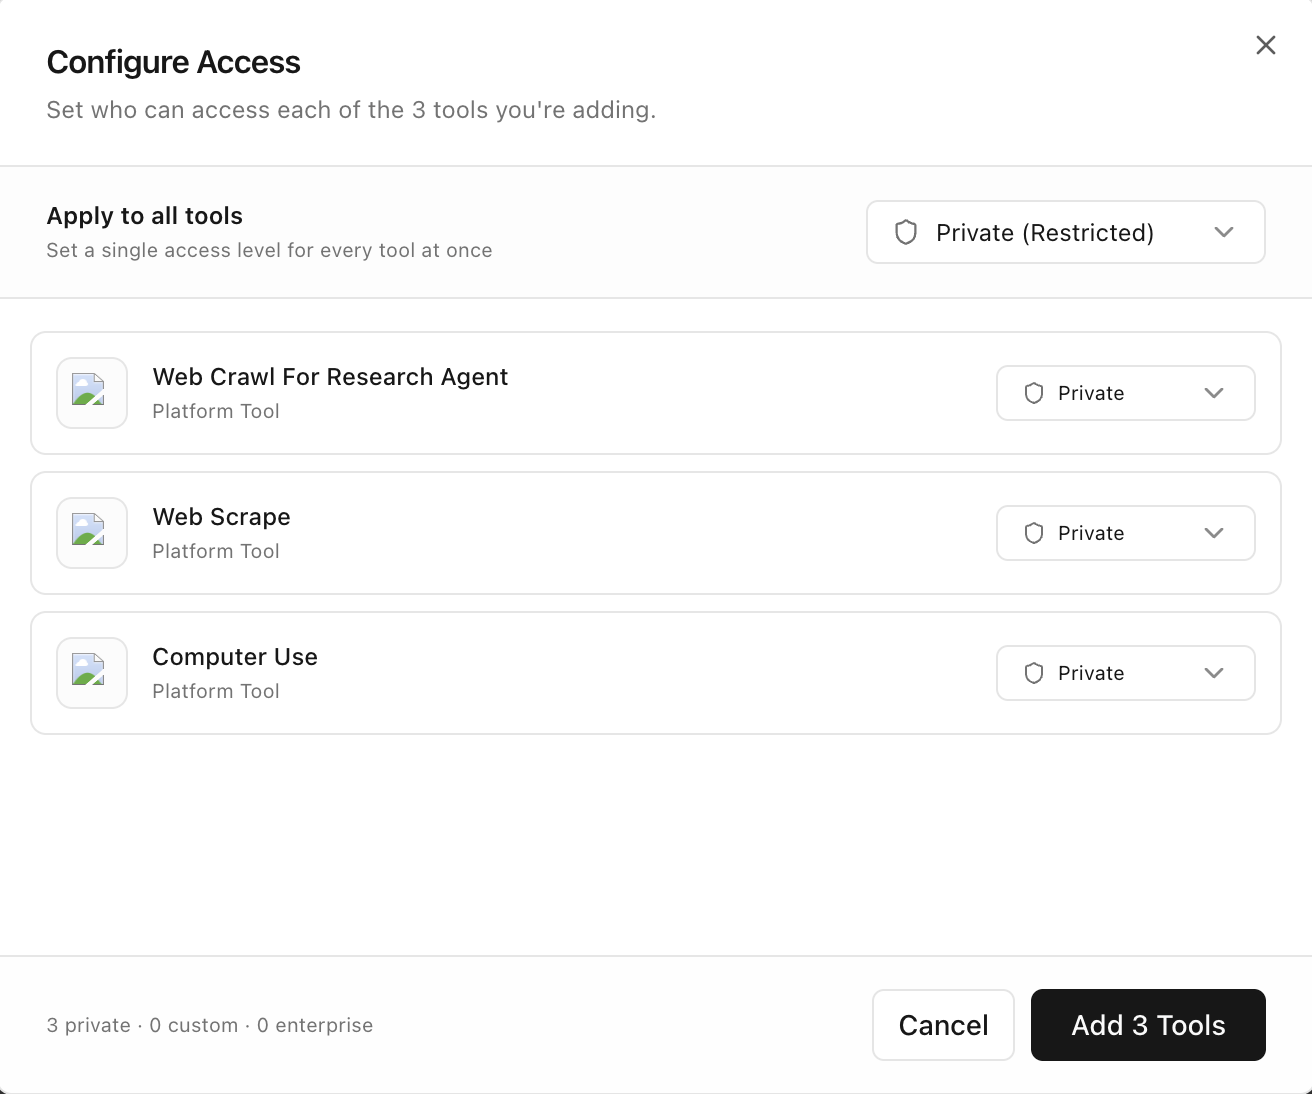
Access Configuration Tips
- Start restrictive (
Private) and loosen only when required - Keep sensitive or high-impact tools limited to trusted users
- Use consistent rules across similar tools
Step 4: Verify Added Tools
After saving, return to the Tools tab and confirm:
- All expected tools are listed
- Access rules are visible
- Toggle state is correct for each tool
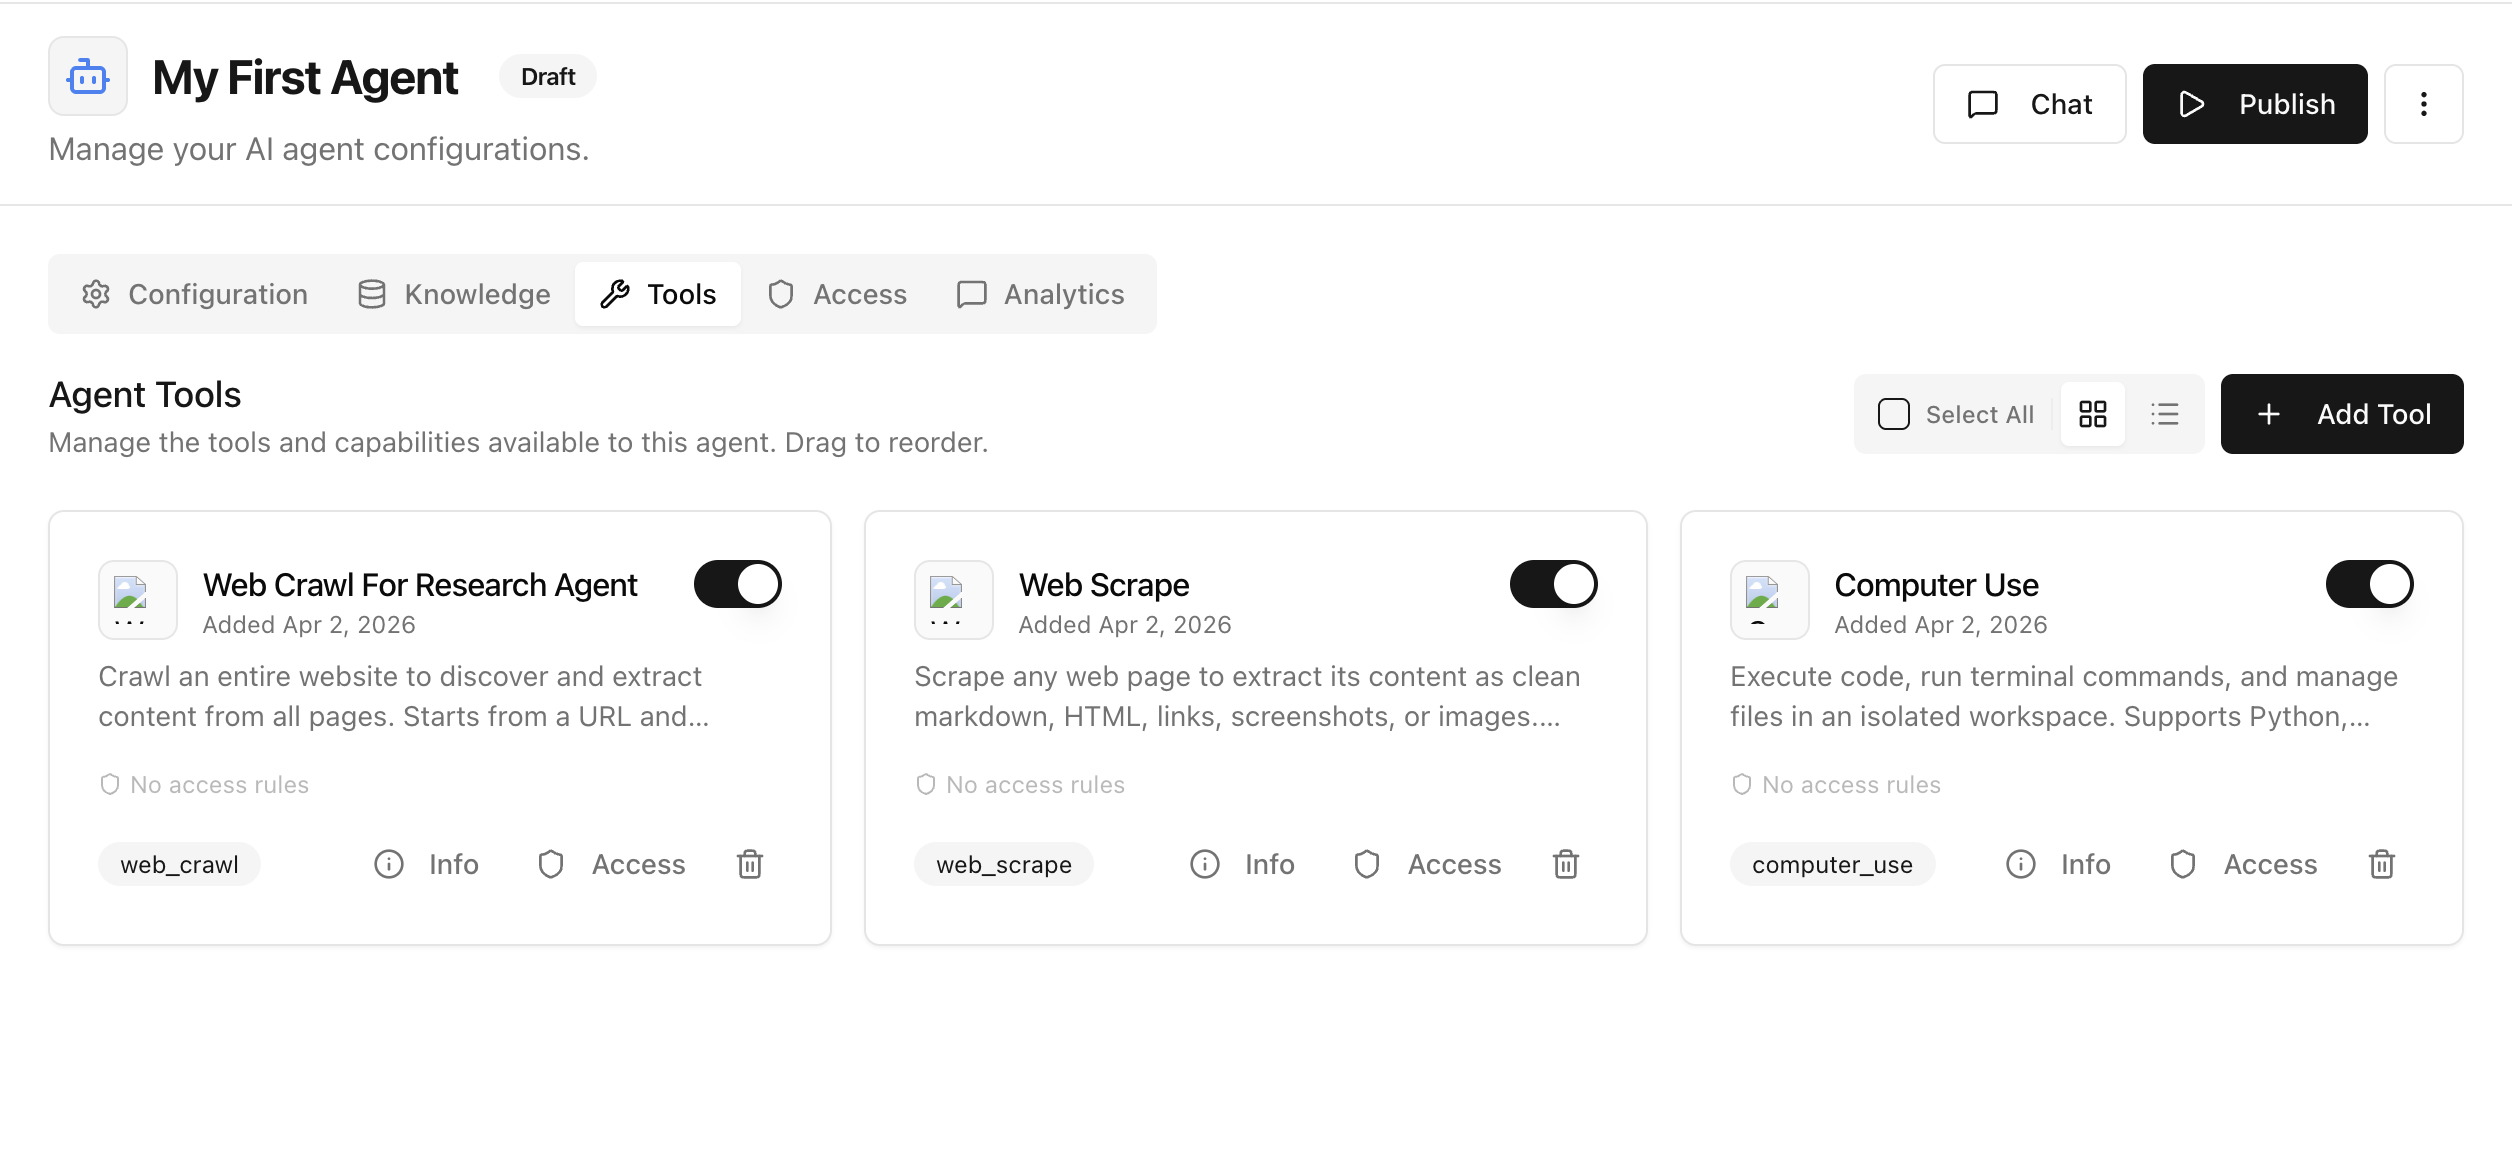
Ongoing Management
Once tools are added, you can:
- Enable or disable tools with the toggle
- Update access on a per-tool basis
- Remove tools that are no longer needed
- Reorder tools to organize operational priority
Best Practices
- Add only the minimum tools needed for the agent's scope.
- Keep tool descriptions and naming clear for team members.
- Test each tool with realistic prompts before publishing.
- Revisit access settings when team roles change.
Next Step
After tool setup, continue to Deploy Agents to publish your agent to the right surface.
Last updated: April 2, 2026