Personal Onboarding
Once your enterprise's call system is set up, each team member with a seat goes through a short personal onboarding. This connects your personal phone to Arkios so you can start making and receiving calls.
You can pause and come back at any time — your progress is saved automatically.
Step 1: Verify Your Personal Phone Number
First, link your personal phone number to your Arkios account.
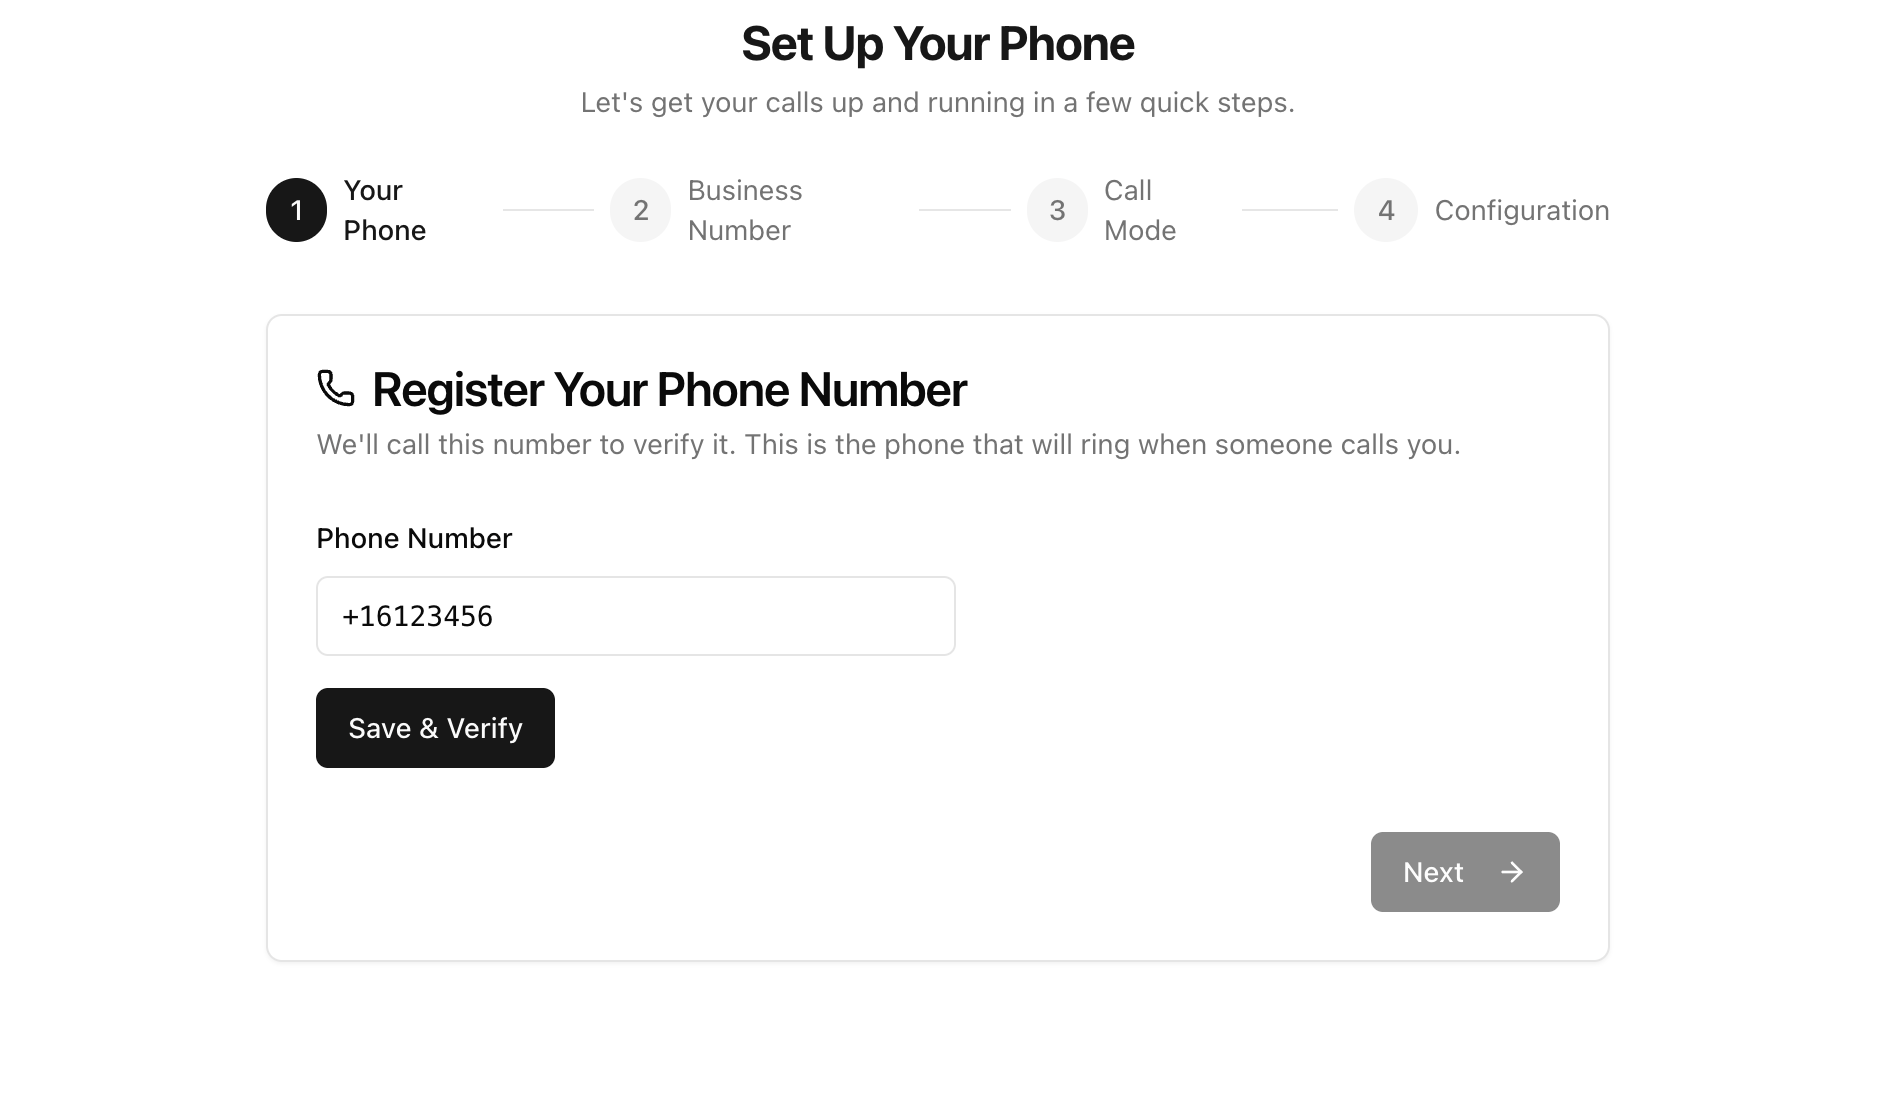
- Enter your phone number in E.164 format (e.g.,
+15551234567). - Click "Save & Verify".
- You'll receive a verification phone call with a code.
- Enter the code to complete verification.
Once verified, your personal phone is linked to your account.
Good to know: If you use your personal phone number (without a new business number), only outbound calls made from the browser are tracked. Incoming calls to your personal number are not tracked by Arkios — because those calls don't go through the system. If you want incoming calls tracked too, you'll need a business number (next step).
Step 2: Get a Personal Business Number (Optional but Recommended)
A business number is a phone number provisioned by Arkios just for you. It's separate from your personal phone number.
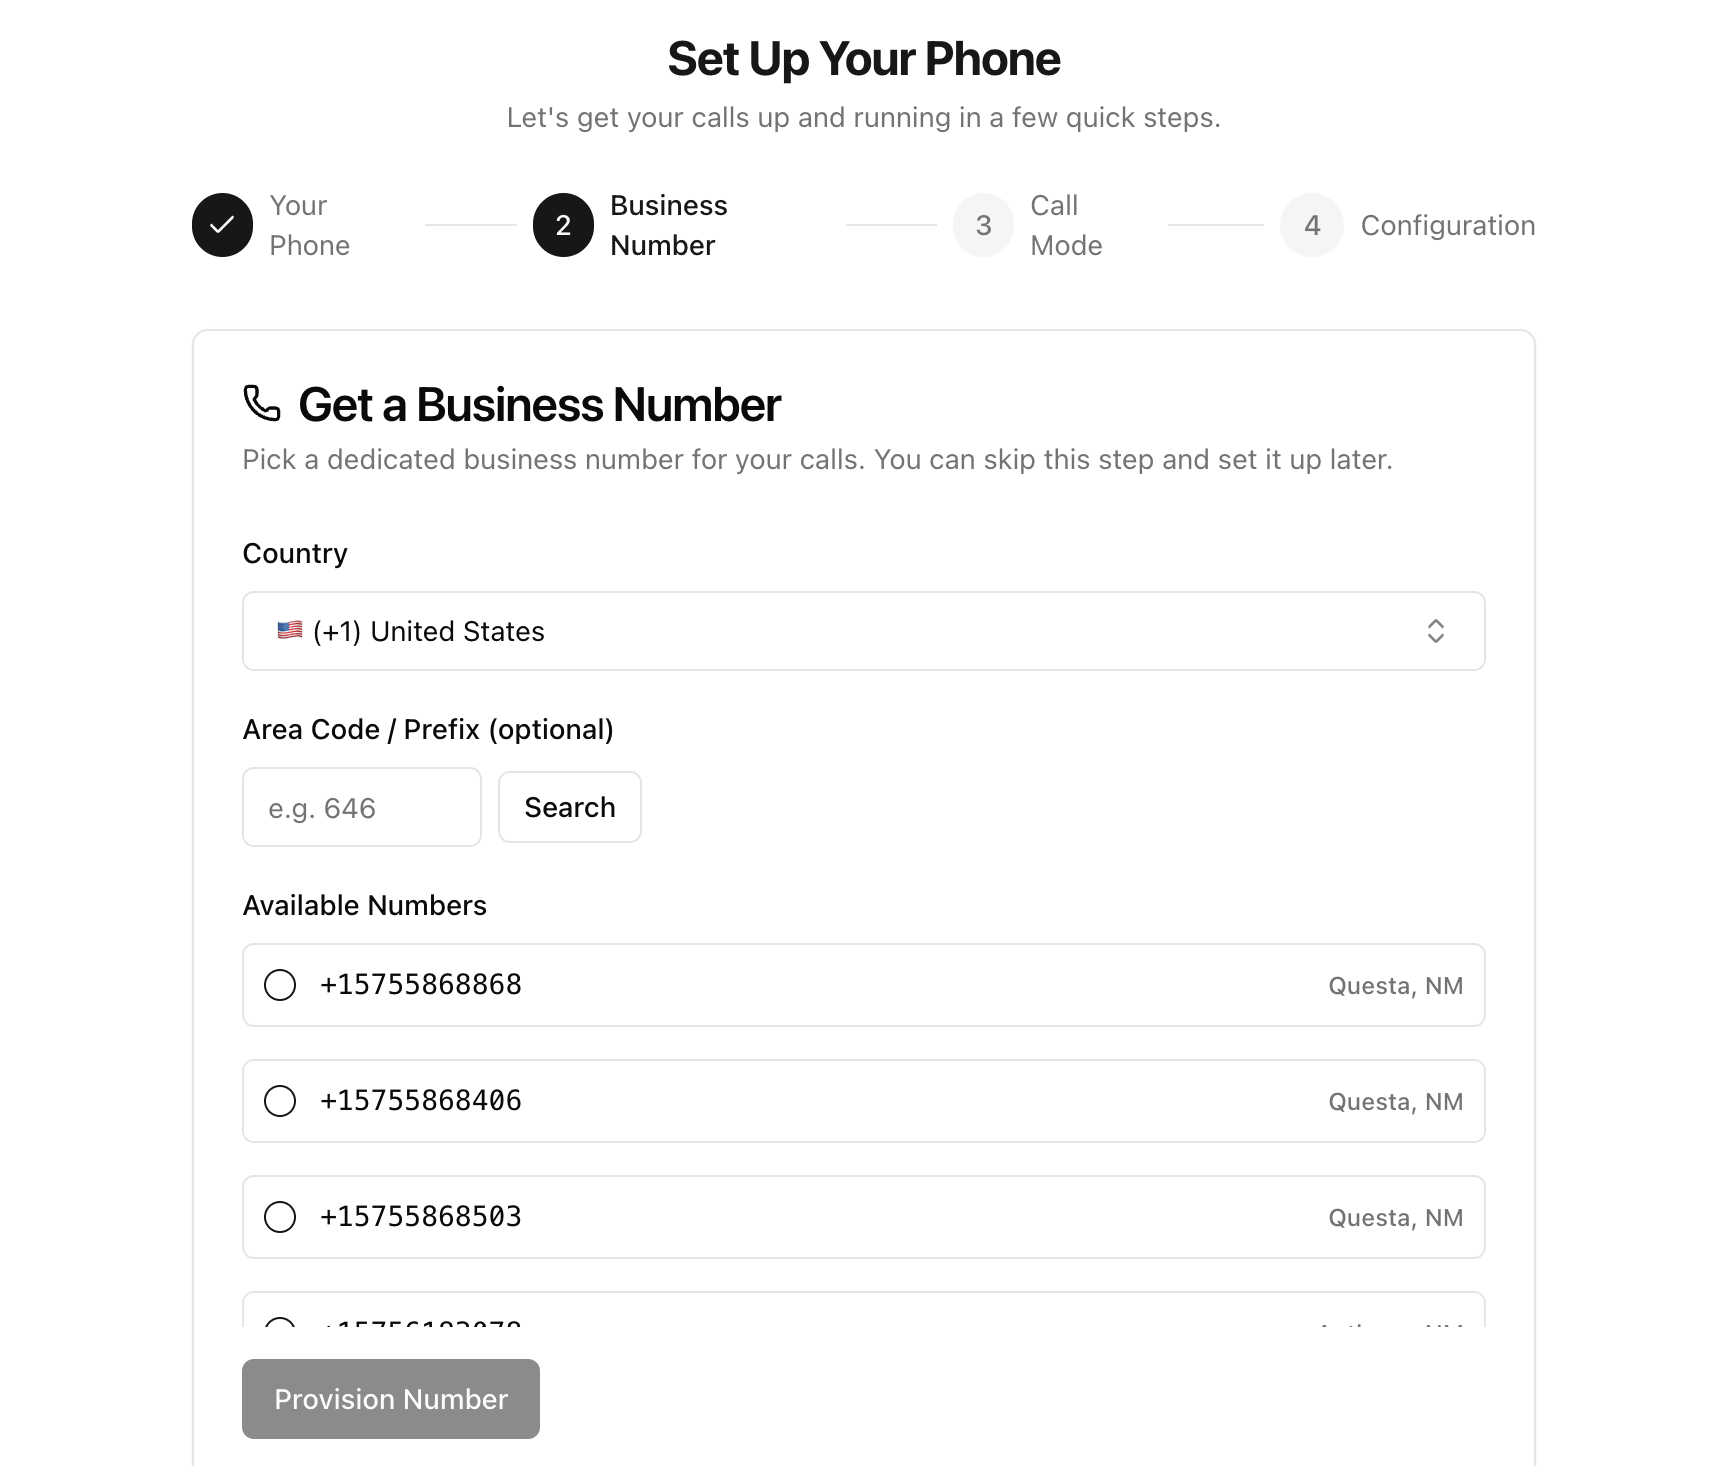
- Select a country and area code.
- Browse the list of available numbers.
- Pick one and click to provision it.
Why Get a Business Number?
With a business number, both incoming and outgoing calls are tracked, recorded, and transcribed — because all calls go through Arkios. If someone calls your business number, the call is routed to your phone (or browser), and Arkios records it automatically.
Without a business number, incoming calls to your personal phone go directly to you and bypass Arkios entirely — so they can't be recorded.
Step 3: Choose Your Call Mode
Pick how you want to receive incoming calls to your business number.
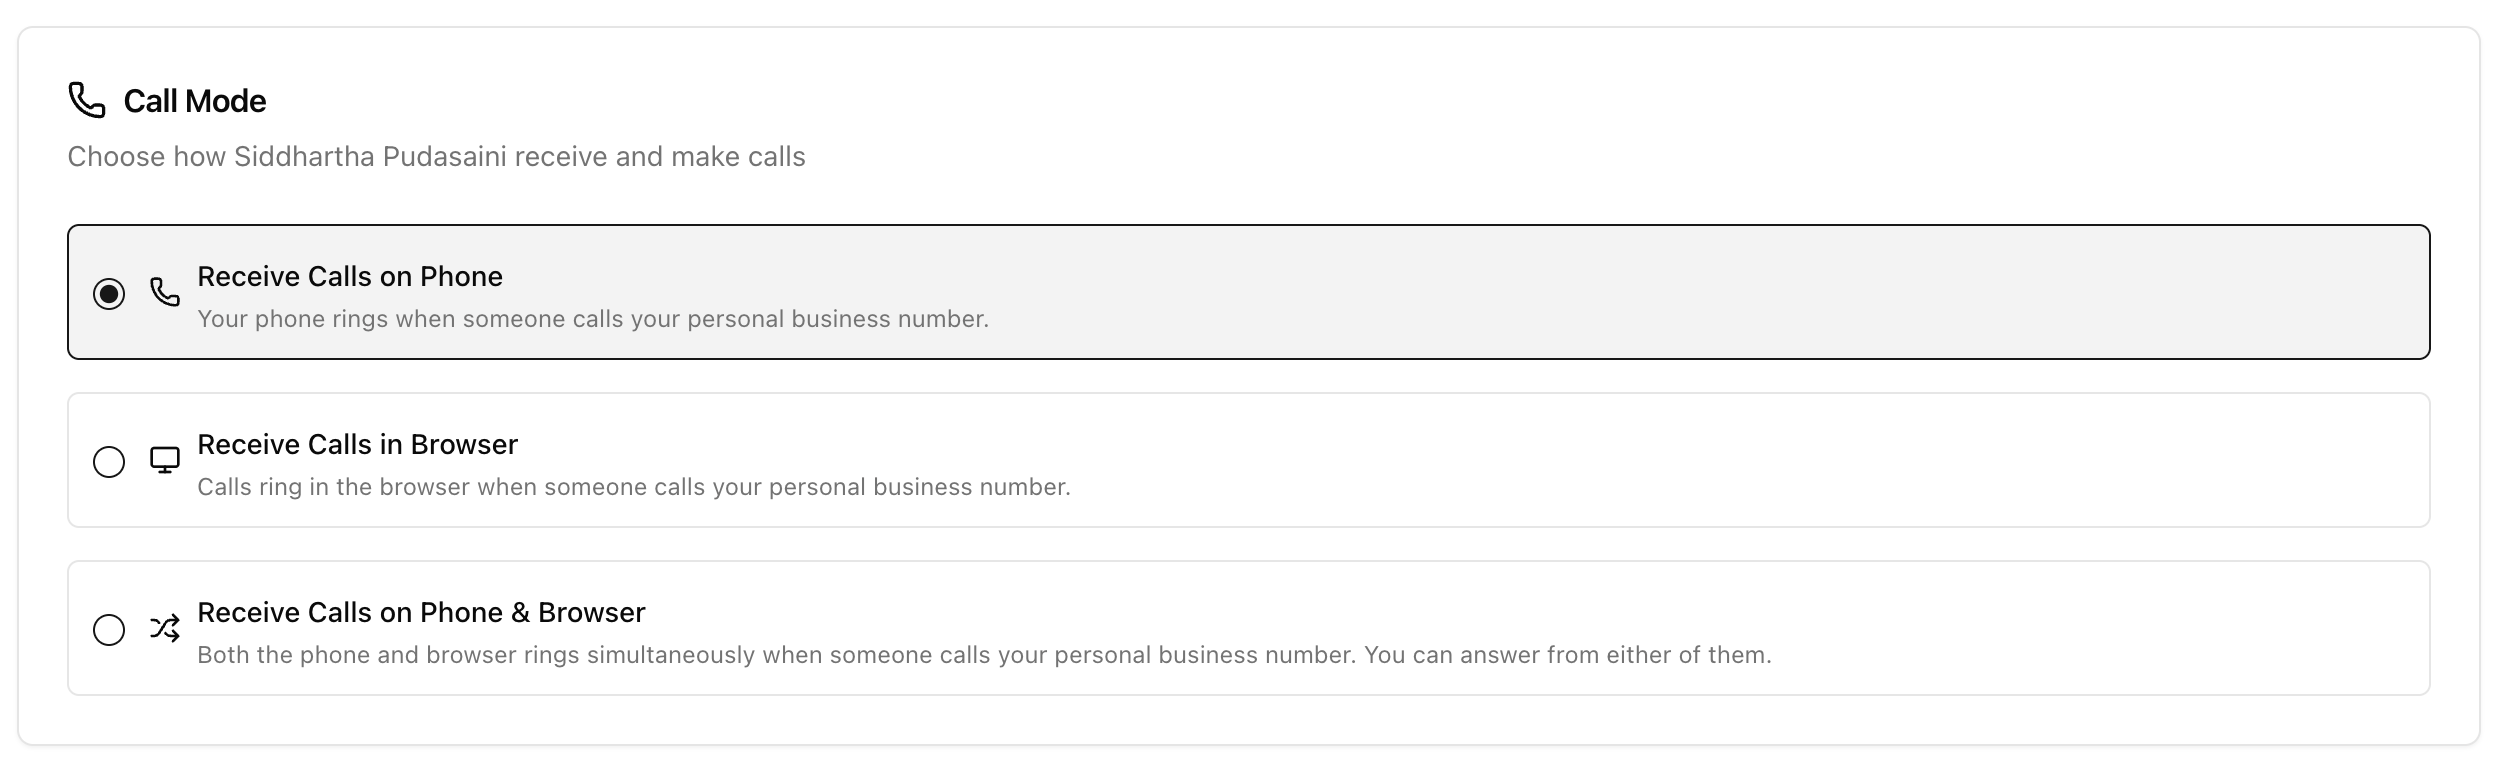
| Mode | What Happens |
|---|---|
| Receive Calls on Phone | Your physical phone rings when someone calls your business number. |
| Receive Calls in Browser | Your browser rings when someone calls your business number. |
| Receive Calls on Phone & Browser | Both your phone and browser ring at the same time. Answer from whichever is more convenient. |
You can change this at any time later in Phone Settings.
Step 4: Configure Recording & Transcription
Finally, choose your recording preferences.
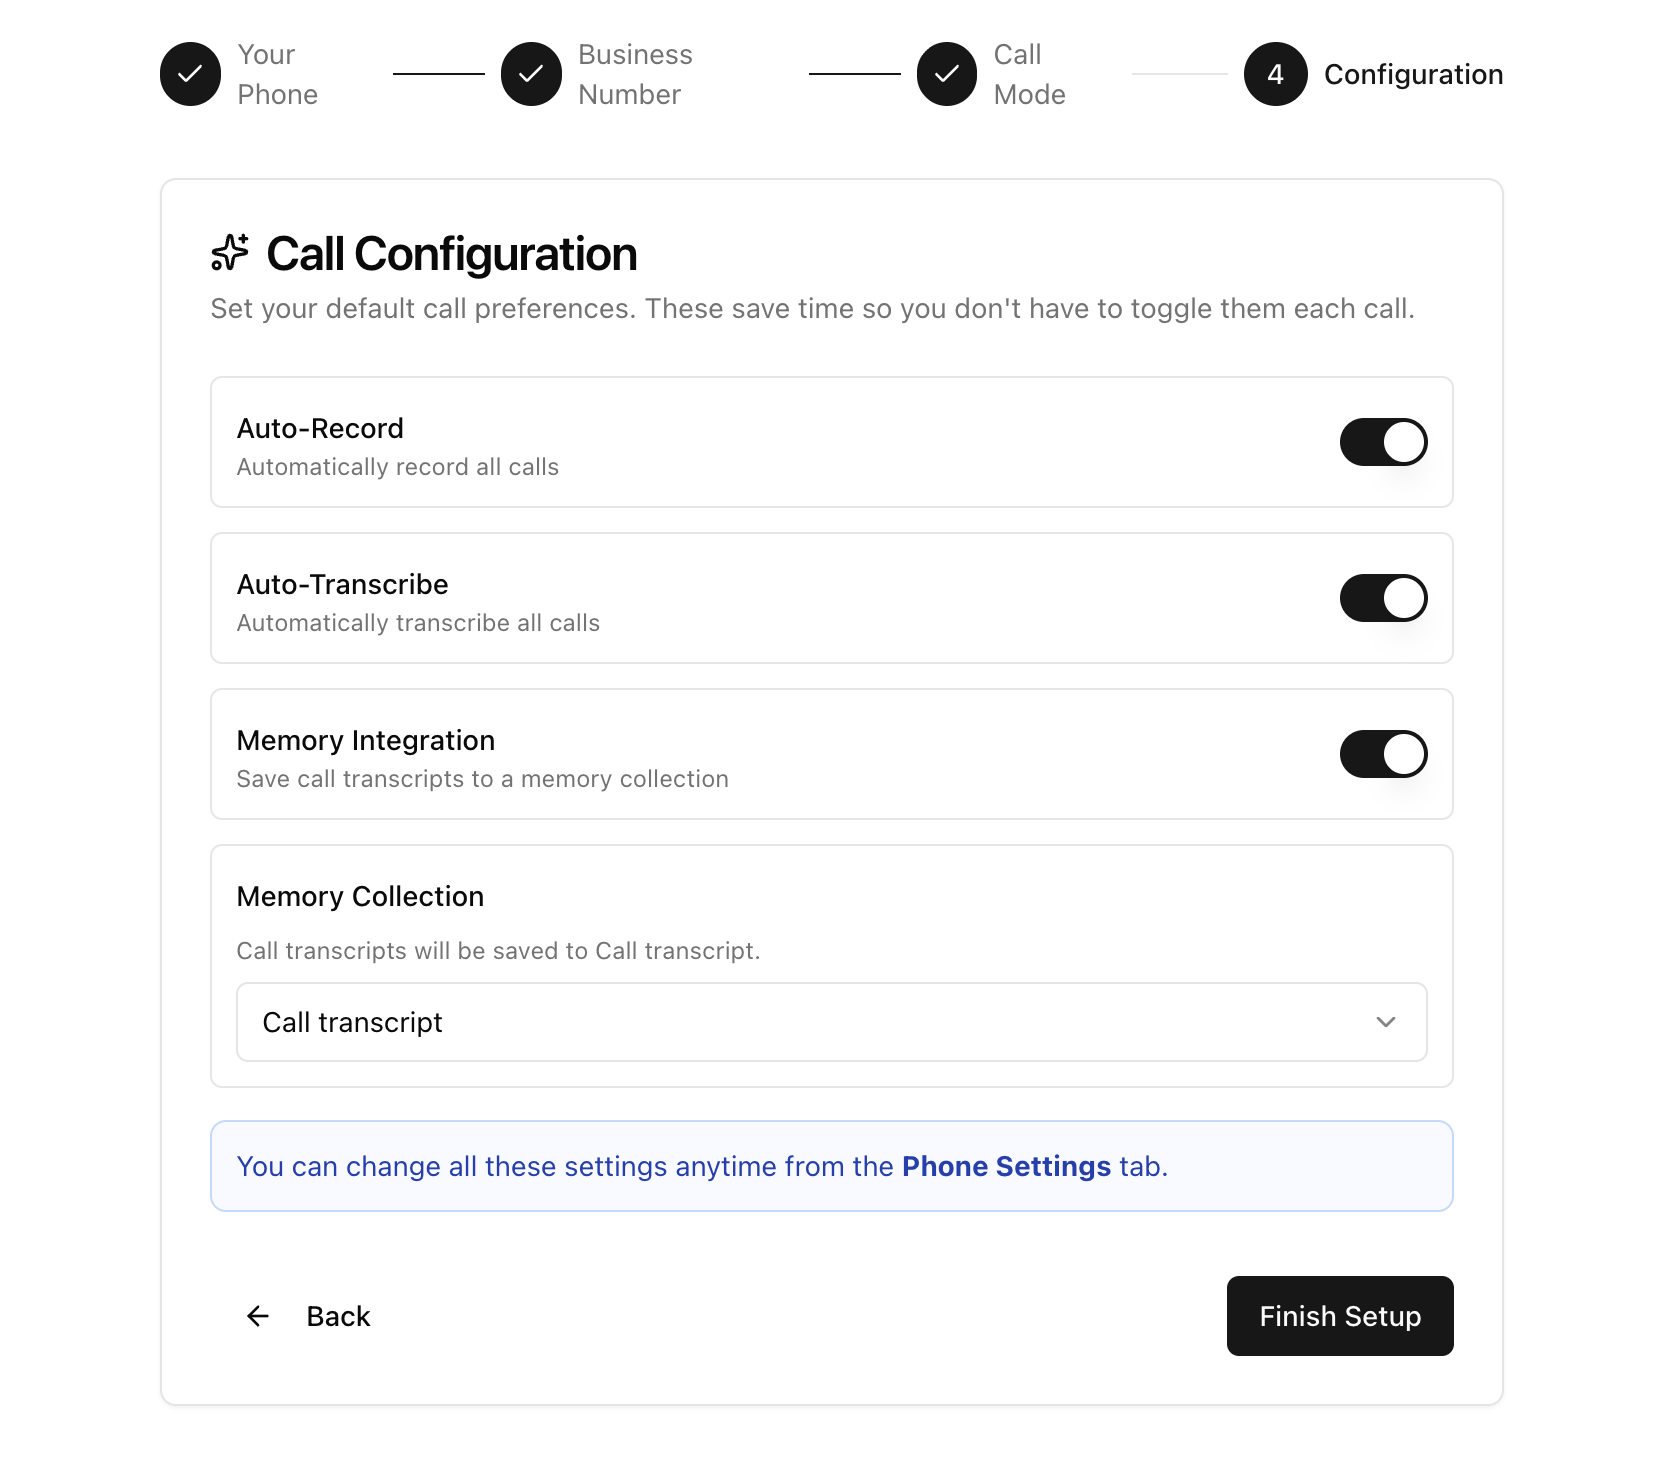
| Setting | Default | What It Does |
|---|---|---|
| Auto Record | On | Automatically records every call you make or receive. |
| Auto Transcribe | On | Automatically creates a text transcript of each recorded call. |
| Memory Integration | Off | Sends transcripts to a memory collection so AI can reference them later. |
| Memory Collection | — | If memory integration is on, choose which collection receives your transcripts. |
Click "Finish Setup" to complete onboarding.
You're All Set
Your phone is connected and ready to go. Head over to Making Calls to learn how to place your first call.
Last updated: April 11, 2026